Connecting to a Desktop Session
The Desktop interactive app gives you a full graphical Linux desktop
running on an SCC compute node. It is the most useful starting point for
neuroimaging, because the viewers you will want — freeview, fsleyes,
mricrogl, MATLAB — all need a graphical display.
Step 1: Log In
Go to scc-ondemand.bu.edu and log in with your BU username and Kerberos password. You land on the dashboard.
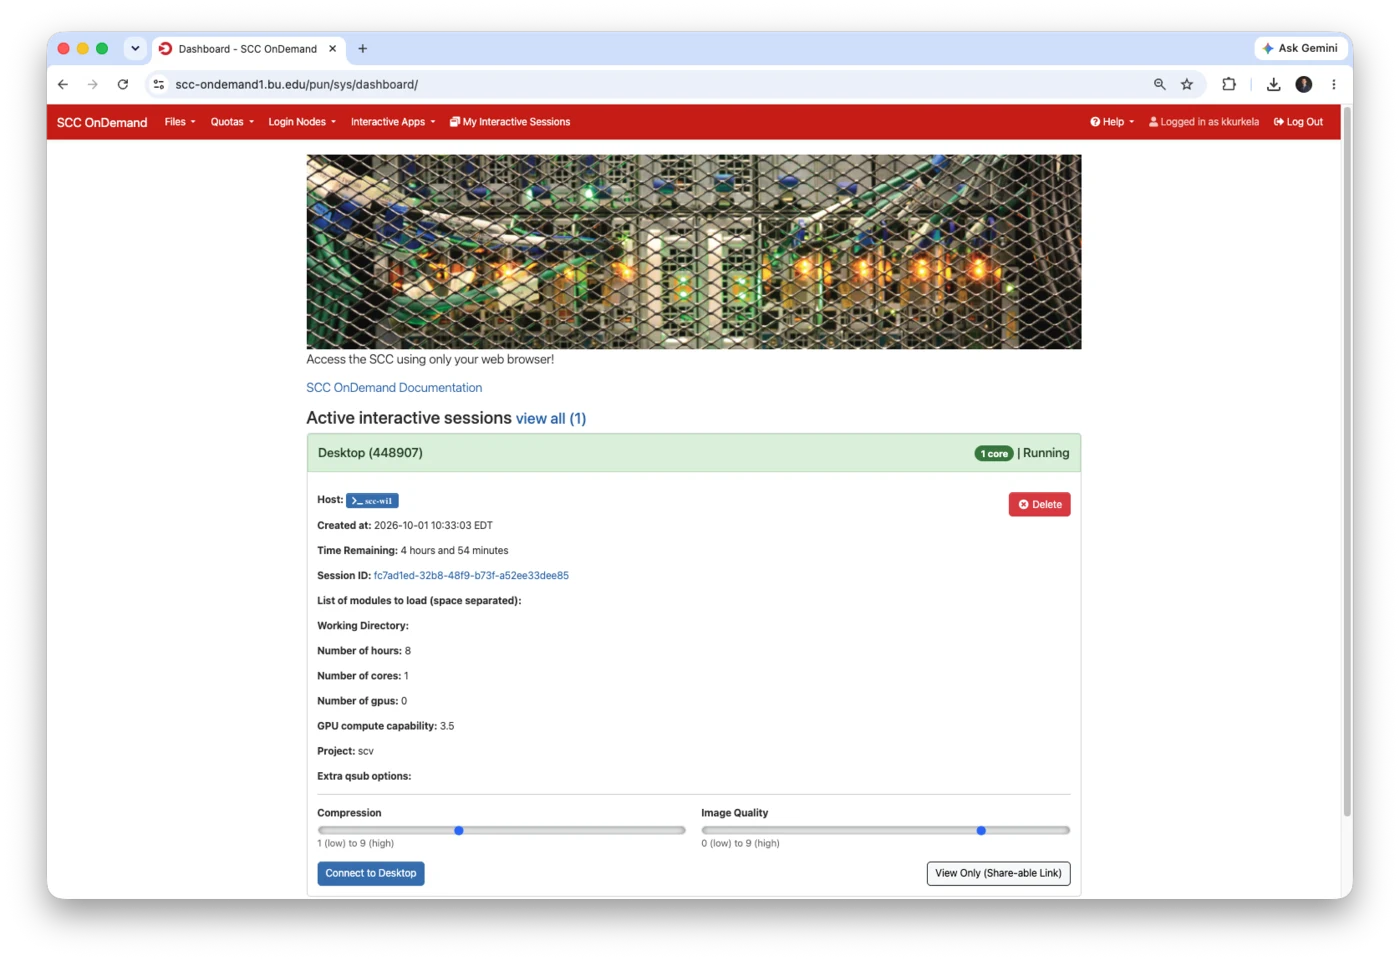
Any sessions you already have running are listed here under Active interactive sessions. On your first visit that list will be empty.
Step 2: Choose the Desktop App
Open the Interactive Apps menu and choose Desktop, the first entry under Desktops.
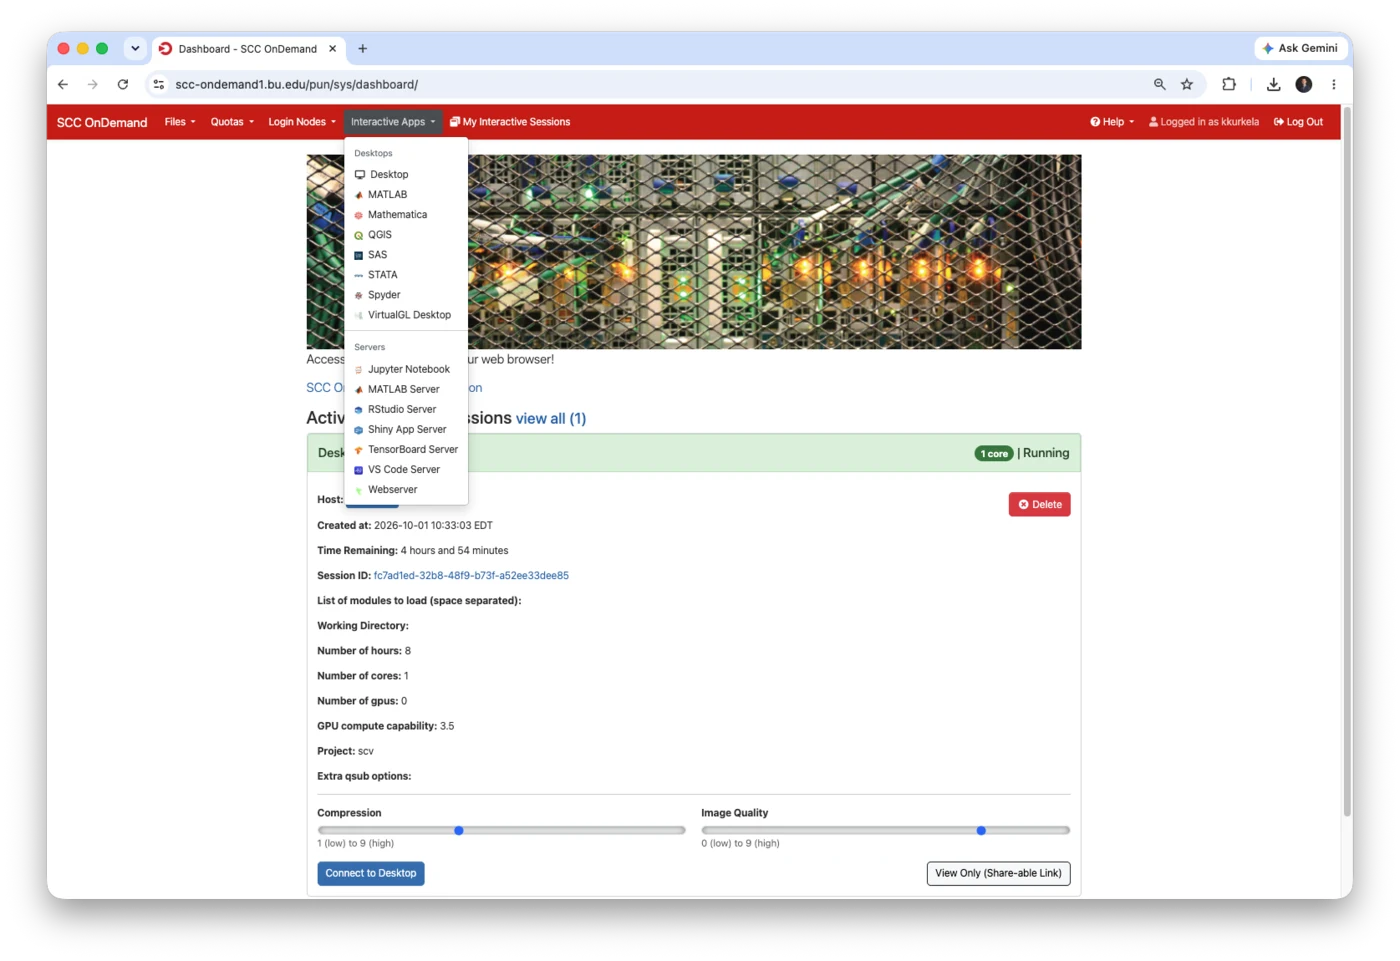
The other entries launch a single application instead of a whole desktop. Desktop is the most flexible: once you have one, you can open a terminal and run anything, including the many tools that have no app of their own.
Step 3: Fill In the Request Form
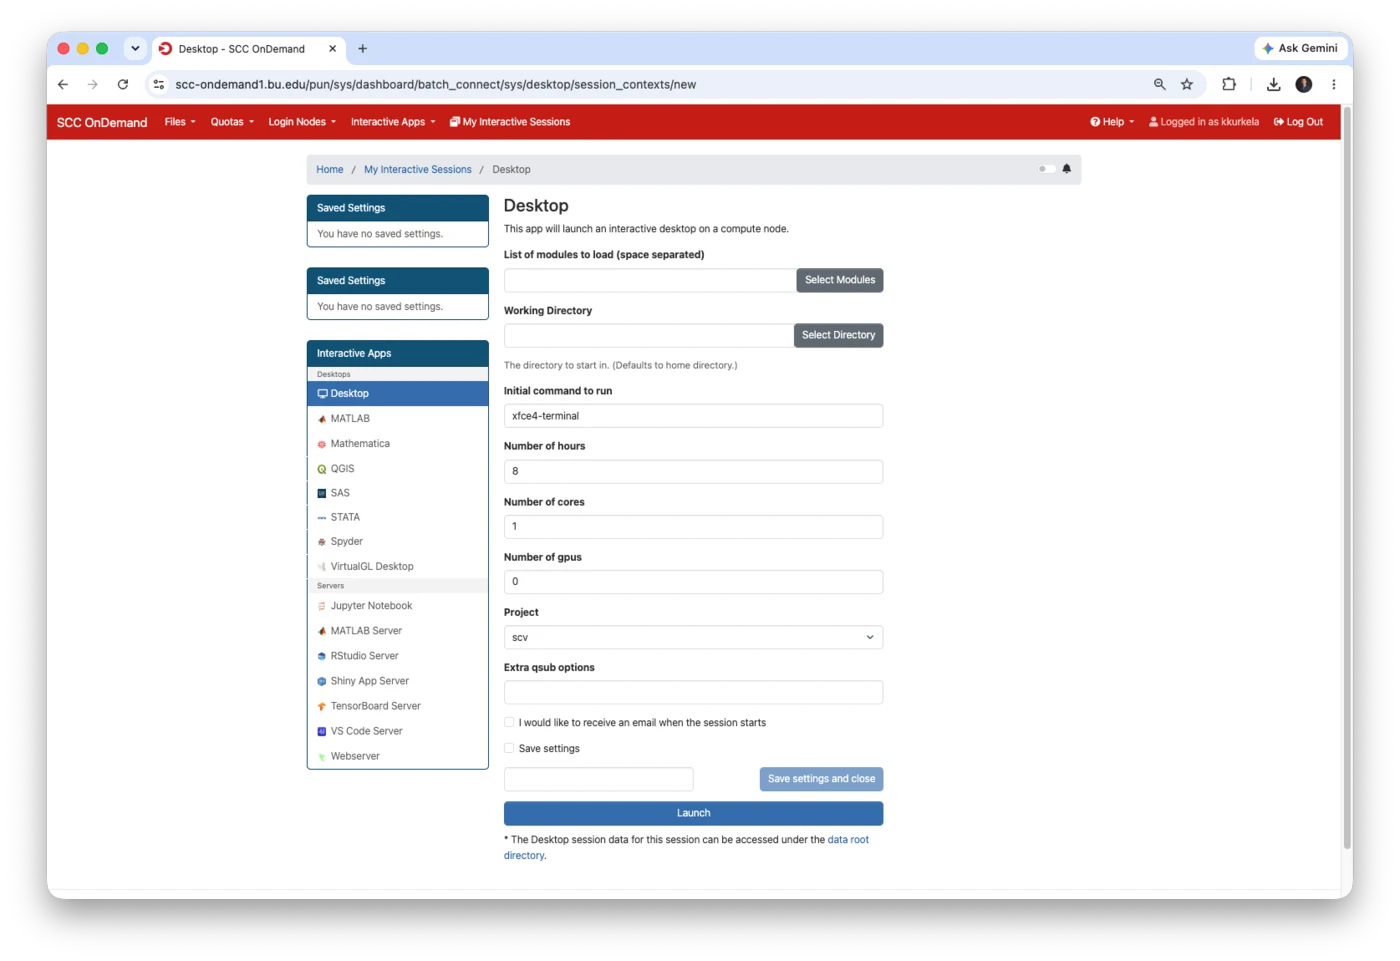
This form is how you tell the scheduler what you need.
| Field | What to put |
|---|---|
| List of modules to load | Software to load automatically, space separated. Leave it empty and load modules yourself in the terminal. |
| Working Directory | The directory the session starts in. Defaults to your home directory. |
| Initial command to run | The program the session opens with. xfce4-terminal gives you a terminal. |
| Number of hours | How long you need. The session is killed when the time runs out. |
| Number of cores | How many CPU cores. 1 is fine for viewing images. |
| Number of gpus | Leave at 0 unless you know you need one. |
| Project | The SCC project the session is charged to. |
| Extra qsub options | Additional scheduler directives. Normally leave it empty. |
Ask for what you need, not the maximum. The more cores and hours you ask for, the longer the scheduler takes to find a node that can give them to you — so a large request often starts later than a small one.
Tick I would like to receive an email when the session starts if you are asking for a lot and expect to wait. Save settings stores the form so you do not have to fill it in again next time.
Then click Launch.
Step 4: Connect
Your session is queued, and the dashboard shows a card for it. When the card turns green and reads Running, click Connect to Desktop.
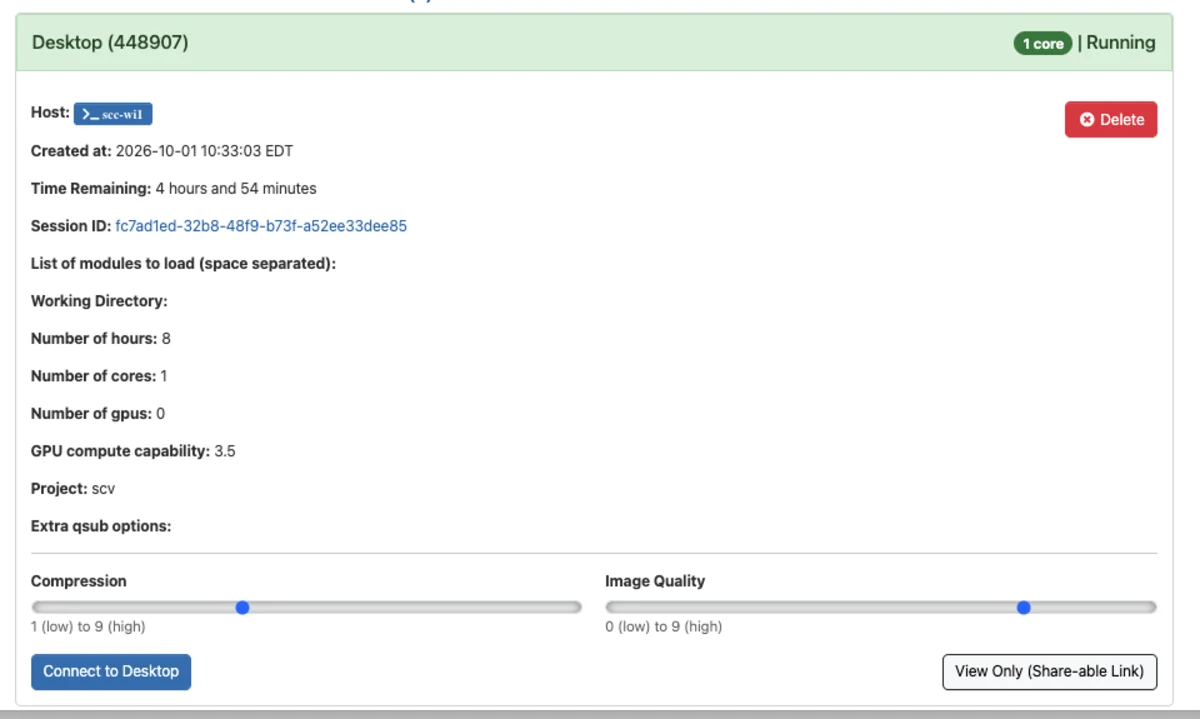
The card tells you which compute node you landed on, when the session was created, and how much time is left. The two sliders control how the desktop is streamed to your browser — lower the image quality if the connection feels sluggish.
Ending a Session
Closing the browser tab does not end the session. It keeps running on its compute node, holding on to the cores it reserved, until the time limit expires.
To end it properly, come back to the dashboard and click Delete on the session card.
Delete is immediate and cannot be undone. Anything unsaved inside the session is lost.